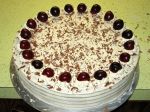
Well, not much has happened on this blog in over two years. I’ve been baking, but somehow stopped keeping track on here. So I’m officially announcing a hiatus for this blog. I might come back to The Professional Pastry Chef at some later point. In the meantime, if you’d like to know what I’m up to in the kitchen, check out this new blog: afterschoolkitchen.wordpress.com It’s not only focused on baking but on my experiments with food in general. Hope to see you over there!
Cloverleaf Dinner Rolls
•September 19, 2010 • Leave a CommentDo you like rolls? I LOVE rolls. My all time favorite are the Kaiser rolls from the “Nassafößa Beck” (Bavarian slang for “Nassenfelser Bäcker;” pronounce: Nauss-a-fu(r)-ss-a Beck; a bakery in the neighbor village of my home village). But since I came here, I have found a couple of recipes for dinner rolls, that could make me forget my passion for the aforementioned Kaiser rolls. You’ve already seen one example at the top of this page, a recipe that I discovered in Marjorie Standish’s Cooking Down East cookbook, almost a year ago, for Thanksgiving.
I found another one in the latest issue of Cook’s Country. Well, the article was really about baking dinner rolls in the shape of Cloverleaf Dinner Rolls, using a muffin pan. And of course, they had developed a recipe that works perfectly to get this shape. Since I LOVE working with yeast dough (as you might by now be able to tell from this blog), and I found the picture of the rolls very appealing, I decided to give it a try. And bought a muffin pan. Yes, shame on my, I didn’t have a regular-sized muffin pan before. Only a pan for mini-muffins. C’mon, I can get muffins everywhere, I don’t really need to also bake them. While I really like muffins, I kind of don’t really want to make them at home. OK, maybe now that I have the pan that’ll change. Who knows.
Anyway, for no particular reason, just for fun, I decided to bake a batch of Cloverleaf Dinner Rolls, today. The article said that you can really use ANY old yeast dough recipe, it’s the shape that matters. I would recommend either a nice dinner roll recipe or, even better, a brioche recipe. Divide into 36 equal sized pieces of dough, roll into balls, set three balls of dough in each muffin cavity. Here’s a couple pictures, showing the process of how to make up the rolls.
 |
 |
 |
Ain’t they beautiful? I underbaked them slightly. They taste a little yeasty, but that’s fine with me. And I’m going to freeze a bunch and will have to reheat them, anyway. Since I really like a buttery taste in those dinner rolls, I’ll try my trusty brioche recipe, next time. Ah, speaking of brioche, I should write about those, at some point, soon. Don’t let me forget about that!
Homemade Pasta
•September 18, 2010 • Leave a CommentPasta is one of those things that my master started to make, back in the day when he had his pastry shop. In his rural Bavarian area, his was pretty much the only shop where you could get small-batch-made real Italian-style semolina-pasta (oops, sorry for all those hyphenated words, I got a little carried away).
Recently, I did a batch of homemade fettuccine, and without special tools, it was a pain in the butt. But store-bought pasta tastes like cardboard! Especially the whole grain pasta that I recently acquired…
Well, I finally bought a pasta maker. I was considering for a long time whether or not I should buy the KitchenAid attachments for my stand mixer. There are two different kinds of KitchenAid accessories, pasta rollers and the pasta extruder for the food grinder attachment. In the end, I decided to save me some money and just get the $35 hand-crank pasta maker from my local Bed Bath & Beyond. I read so many horror stories about the extruder, and the pasta rollers are just WAY too expensive if you ask me…
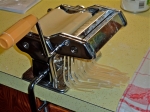
Anyway, you shouldn’t clean pasta makers with water, so I decided to make a first batch of very simple pasta dough (using a recipe in the user’s guide) to clean the machine and maybe use the rest for some homemade pasta. It’s really just water and flour (which I normally find less desirable then the egg-semolina-version, but for cleaning purposes this was more appropriate), but still, the noodles taste SOO much better than store-bought dry pasta…
 |
 |
OK, this is more like an appetizer-post, since the actual content is pretty thin. I’ll be back with more pasta!
Homemade Granola
•September 18, 2010 • Leave a CommentOK, this is only marginally pastry-chef-related, but still somewhat relevant. Ever been bored with store-bought granola? I am. There’s only so many brands of granola, around here, and I think I’m through with them. I found my favorite, but it’s still boring to buy the same stuff all the time. Since I was out of breakfast food, I decided to do my own granola. A quick google search revealed Alton Brown’s recipe for granola which looked like a reasonable start for my own experiments. With a lengthy shopping list, I went to my local health food store to buy the ingredients in bulk.
Back home, I started the recipe and realized that I only had light brown sugar, and no vegetable oil. Never mind, then, butter tastes better, anyway. So, I melted the butter and mixed it with the maple syrup and the salt. Turns out that 3/4 tsp of salt makes the granola pretty salty! If you like that, fine. If not, cut down the salt to 1/4 to 1/2 tsp.
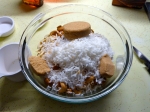
Here a little picture gallery of my granola at different stages.
 |
 |
 |
After the roasted granola had cooled off to room temperature, I put it into my shiny new Walmart-granola-dispenser and mixed in some raisins.
Aside from the slight saltiness, the homemade granola tastes great! Even more so with fresh fruit… I can’t wait to experiment with honey, cinnamon, other nuts, etc…
Baking Bread (Baguette, Buttertoast)
•September 17, 2010 • Leave a CommentI was out of bread. Not a big issue if you have yeast, flour and salt in the house. And a faucet. Earlier on this blog, I have written about Bo Friberg’s French Baguette. While that tastes totally amazing, it’s a kind of “fancied up” version of French baguette, in my opinion. The baguette that I learned from my master in Germany really only needs yeast, flour, salt, water. Want the formula? (Woohoo, novelty, a recipe on my blog!!!)
- 100% Bread Flour
- 2% Dry Yeast
- 2% Salt
- 70-73% Water
That’s it. Using the sponge method (dissolve the yeast in about half the water, add half the flour, mix, let rest, then add remaining water and flour, knead, add salt at the very end), we get a very soft, moist dough that is very hard to knead by hand (because it’s sticky!). Stand mixer recommended!
Make up into equal sized “ropes” and let them proof on a kitchen towel. Transfer on a pizza peel (or the likes), using a knife, cut the top a couple times and stick in the (hot! ~480ºF) oven (on a baking stone!). Use steam for the first 10 minutes.
This is what my latest attempt looked like:
 |
 |
Well, I’m still working on the crust appearance. And I need a better knife. My old bread knife doesn’t really cut the soft dough. That’s a job for the good old Swiss serrated paring knife (which I haven’t found in a local store, yet)!
At least, the crumb isn’t too bad. The holes could be bigger, but it’s nicely risen, moist and white. Earlier attempts in my career have been flat, dry, and gray on the inside. So, this version is definitely a step further in my mastery of French Baguette (which, according to my master, is one of the hardest challenges in baking).
Another kind of bread that I learned to bake in Germany is “Buttertoast.” That’s just simply white sandwich bread, with a nice amount of butter in the dough. Ah, you want this formula, as well? Sure, why not.
- 100% Bread Flour
- 4.5% Light Brown Sugar
- 2.5% Dry Yeast
- 2% Salt
- 12.5% Butter
- 60% Whole Milk
Again, use the sponge method to get a nice texture. Let the sponge ferment for 30 minutes, add the remaining ingredients, knead until gluten is developed (window test, or just look at/touch the surface of the dough). Let rest for 20 minutes, knead by hand to work out big air bubbles. Make up, pan and proof for 20-30 minutes. Brush with whole milk, slice the top lengthwise and bake at 395ºF for 35-40 minutes. You might have to turn down the heat halfway through or cover the bread to prevent excessive browning.
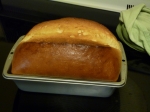
Ah, yes, pictures:
 |
 |
 |
I would recommend using 500g bread flour, I used 600g, that’s a little too much for a regular loaf pan. Also, I did not work the dough enough. You can see that at the top, there are still a couple of larger air bubbles. Make sure to really beat the dough up and get that air out!
After baking, slice into half inch slices and freeze. Can be toasted out of the freezer. If you try the recipes, please let me know how they worked out for you!
Blackberry Jam Cake
•September 12, 2010 • 1 CommentAnother potluck with my friends and colleagues from the university happened. As always, that caused me to think for days what I’m going to make. In the end, the latest issue of Cook’s Country coming in the mail helped make the decision. A rather lengthy article described the overhaul of a traditional Appalachian dessert, the Blackberry Jam Cake. The author reported all kinds of problems with different recipes taken from several cookbooks and what the test kitchen had to change in order to get rid of all the flaws in those recipes.
Well, I thought this should be a foolproof recipe, so I just went ahead and followed the directions, disregarding what I knew about creating cake batter and so on. I was a little worried, when I took the sponge out of the oven and it had shrunk away from the baking ring a little bit. Also, it slightly collapsed, while it was cooling down. In order to prevent further shrinkage, I turned it upside down, so that it would hang in the ring upside down and not collapse further. I did not think that the amount of butter in the recipe would prevent the cake from sticking to the parchment paper. As soon as I had turned it upside down, it was no longer connected to the ring or the parchment paper, so it just fell onto the kitchen towel. Not good. But it was cooked through all the way, and the bottom of the sponge didn’t look too bad, so I just left it on the rack to cool off.
Meanwhile, I started preparing the caramel for the caramel buttercream. The caramel consists of brown sugar, milk, flour and cornstarch. It has to cook until it considerably thickens. The recipe said, cook it over medium heat for about 7 minutes. Yeah, not with my smoothtop range. It took about twice as much time, and I had to switch to high after 7 minutes because it was heating up so slowly. Once nicely thickened, I took it off the heat and let it cool down a little bit. Carefully tasting it (trying not to burn my mouth), I noticed a very prominent floury taste. Crap. That was not supposed to be in there. Well, anyway, if things went terribly wrong, I could just do something else, entirely.
After a couple hours, I finished the buttercream, and now the floury taste was gone, replaced by a very nice nutty flavor. The buttercream actually turned out to be AMAZING! Best frosting ever…
I let everything cool off over night, and in the morning first whipped the buttercream to make it light and fluffy again. Then I cut the sponge in half. No surprise, it was kind of dense. Not really a nice and fluffy texture. But the crumbs tasted OK, so I just went ahead and assembled the cake. Took longer than expected because the buttercream started to curdle a little bit (caramel and butter apparently have different opinions about how long it takes them to reach room temperature after spending a night together in the fridge). Not a problem for my stand mixer! Several minutes later, everything was smooth again, and I could finish the icing of the cake. Then chop up some walnuts, roast them in a pan, and off we go, decorating the cake. Wanna see?
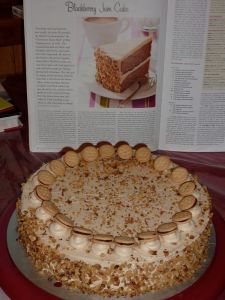
Yes, I was kind of satisfied with the appearance of this cake. I think it looks much nicer than the one in the picture of the Cook’s Country. The S’mores flavored cookies on top were an emergency solution for me not being able to acquire fresh blackberries. Our local grocery store had half pints of blackberries for $2.50 (just having spent half my summer in Seattle, this seems like a ripoff), but all of them contained at least one berry that had decided to grow a Santa beard. Not very appealing…
Anyway, when we finally cut the cake, in the evening, the color of the sponge looked greyish-blue, and the bottom layer had this nasty wet and dense spot that you always get when your cake collapses after baking. Those issues were well known by the author of the recipe (there were even pictures of them in the article) and supposed to have been fixed! They had substituted baking powder for baking soda because of the discoloration (apparently that doesn’t really matter), and supposedly had adjusted proportions and procedures to prevent the cake from becoming a dense slab of baked batter.
While I have no idea what happened with the color (I’m not a chemist), I have a theory about the texture. I think that the batter was simply overbeaten. There’s a reason that I learned not to use the stand mixer for incorporating flour into a cake batter. Next time, I will try doing that by hand (instead of “reducing the spieed to medium low and adding flour in 3 additions, alternating with 2 additions of jam mixture”), and we will see how it’s going to turn out…
Anyway, the unanimous opinion was that the cake tasted delicious. Well, it had about four sticks of butter in it (including frosting), so that’s not a big surprise 😉
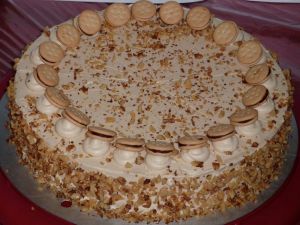
The final product in “artistic” presentation.
A European’s take on an American classic: Blackberry Jam Cake
Banana Tea Cake
•July 10, 2010 • Leave a CommentAsk a hausfrau what to do with overripe bananas, and she will tell you to bake banana bread. Ask the Professional Pastry Chef, and it will tell you to bake a Banana Tea Cake. What’s the difference? Well, the one is a bread, the other a cake. There’s your difference. But, seriously, is it only the name? We’ll come back to this issue, later on.
Looks familiar enough, flour, sugar, salt, butter, eggs, banana, baking soda, vanilla, and walnuts.
Well, it’s a regular cake batter, and surely enough, everything starts with beating melted butter with the sugar for several minutes.
In the meantime, the dry ingredients are being mixed. This step is important, not only to distribute salt and baking soda evenly throughout the flour. It also coats the walnuts with a thin layer of flour which helps preventing them from sinking to the bottom of the pan while baking.
Once butter and sugar is well beaten, eggs, vanilla and the banana puree are mixed in.
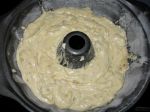
After stirring in the dry ingredients, the batter is poured into the buttered and floured bundt pan.
Then, the pan goes into the preheated oven, standard baking temperature of 350ºF. 45 Minutes later, the cake is baked and can come out of the oven. Bo Friberg urges the baker to unmold the cake as soon as possible to prevent the cake from soaking through.
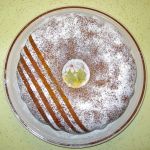
After the cake is cooled off, it can be decorated either with powdered sugar or a glaze. I chose the powdered sugar, and went for the adidas sports look. Soccer World Cup is on, after all 😉 (BTW, Germany just scored a third place. Congrats on a great game to the German soccer team!)
Now, back to the question whether or not this is different from your regular old banana bread. Well, it’s baked in a bundt pan, not a loaf pan. So it doesn’t have the typical “bread shape.” Otherwise, not so much difference, after all! It’s leavened with baking soda – check. It contains banana puree – check. There are nuts in the cake – check. It’s sweet, heck, it’s VERY sweet, so – check. Ah, well, that looks a helluva lot like banana bread! There’s one difference, though: this cake is the softest, most moist version of banana bread I’ve ever had! It is really amazingly spongy, the walnuts are just a perfect addition to the bananas. It’s just a tad too sweet for my tooth. I will have to cut back on the sugar, next time. Otherwise, this is easily THE banana cake/bread recipe.
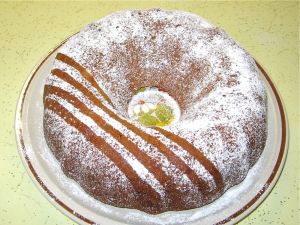
The final product in “artistic” presentation.
Banana Tea Cake. Banana Bread? Who cares, it’s delicious!
Pecan-Whiskey Tart
•July 8, 2010 • Leave a CommentA potluck dinner some time ago left me with a bottle of finest Irish Whiskey – we treated ourselves to some Irish coffee, back then. Well, what should I say, I’m not a heavy drinker. Now and then a glass of wine, that’s all. So, what use could I put this bottle of hard liquor to? In the pastry kitchen, liquor is usually used to flavor baked goods (and the alcohol acts as a preservative at the same time). Of course, the Professional Pastry Chef saved the day. The index had exactly one entry for Whiskey: Pecan-Whiskey Tart. I love pecans, so it was decided, I would try this tart at some point.
If you are now wondering what exactly a tart is, and if it isn’t just a fancy name for a pie, I would like to quote Bo Friberg, who addresses this very question in his introduction to the chapter “Tarts.”
It is a common misconception that a tart is a European type of pie, or nothing more than a pie with a fancy name. Pies and tarts do have some similarities: they are both made of a crust and a filling, and they are usually baked in a metal tin. However, the baking pan itself sets the two apart: Tart pans are not as deep as pie pans, so they hold less, they have almost straight sides, the sides are usually fluted, and the pans have no lip. A tart is removed in one piece from the baking pan. A pie, on the other hand, is cut and served from the baking pan; it cannot be unmolded because of its fragile crust and large, mounded filling. Since a pie will fall apart if you try to take it out of the pan whole, pie pans have slanted sides to make serving easier. In most cases a pie is made with a double crust, and a tart with a single, but actually both can be made either way.
Let me add a couple of things. First of all: pies can be unmolded. Believe me, I’ve tried. You can even stack pies on top of each other. We recently created a three-layered pie, but that’s a different story. And second, the crust is typically different for tarts and pies. While a tart uses a sweet crumbly short crust, the pie crust is very flaky and not necessarily sweet, the surface more smooth.
Today, I decided to treat my fellow researchers to this specialty during our weekly group meeting. I just had used up all the short dough that I had made and frozen, recently (see last blog entry), so I had to make a new dough for the crust. I did not want to make a large quantity and freeze the rest, since it was kind of a hassle to work with the previously frozen dough. The recipe in The Professional Pastry Chef (from now on, I might as well use the acronym TPPC) is hard to scale down, so I tried a new recipe out of a cookbook solely devoted to Pastry. This turned out to be quite a nice dough, it was even easier to work with than the TPPC one!
 |
 |
 |
 |
 |
Turns out that making short dough is not so much different from making pie crust 😉 Put the sifted dry ingredients (flour, sugar, salt) in a food processor, process until combined, then add the cubed, chilled butter, process until the texture looks crumbly. Then add the liquid ingredients (chilled water and an egg yolk), process until everything starts holding together. Remove from the processor and knead lightly on the counter until you have a smooth ball. E voilá, there you go, the ball has to go into the fridge for half an hour, perfect time to do the dishes and preheat the oven!
 |
 |
I learned that you should roll out short dough with as little flour as possible to not get an unpleasantly tough and hard texture in the final product. Turns out that sometimes pastry chefs can learn from housewives. Using two sheets of waxed paper eliminates the need for flour at all and helps transferring the rolled out crust into the pan.
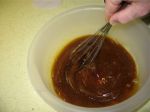
While the pastry-lined pan was chilling in the freezer, I prepared the filling for the tart. It actually is pretty similar to a pecan pie filling. But see for yourselves…
 |
 |
 |
 |
 |
 |
Yummy ingredients: four eggs, a lot of brown sugar, molasses and light corn syrup, some vanilla, melted butter, and of course pecans and whiskey. Everything nicely mixed together, and filled into the prepared and chilled pastry shell. Yes, it’s loaded with carbs. But honestly, who cares? 😉
 |
 |
Next step: baking. 350ºF for about 35 minutes. Then off to the cooling rack. Well, as far as “cooling” goes at almost 90 degrees room temperature…
So, now it’s ready to eat, right? Well, no. This is The Professional Pastry Chef! We have to do some decorations!
 |
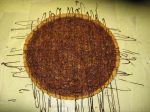 |
The tiny white thingy is a piping bag made out of parchment paper. And I just realized that Bo Friberg actually has a little diagram with directions how to do that (pg. 505 in case you’re interested). Neat!
And now it’s done and the tart can go into the fridge to further cool down and set.
There you go. Pecan-Whiskey Tart in the fridge. It was actually quite delicious! The Whiskey taste was there but not too prominent (although I accidentally used twice the requested amount… much to the delight of our Irish post-doc Tommy 😉 ). In my opinion, the texture was a little too moist and fudgy. I think, I will only use three whole eggs and one yolk, and the right amount of Whiskey, next time.

The final product in “artistic” presentation.
Pecan-Whiskey Tart. Deliciousness…
Gâteau Lausanne (Short Dough, Vanilla Buttercream)
•June 16, 2010 • 1 CommentIn my last post on this blog, I wrote about the Gâteau Lausanne (“Lausanner Torte”). Well, it’s been a while since I made this cake, so I kind of wanted to make one of those. On the other hand, I’m trying to pursue my quest to bake my way through the Professional Pastry Chef. So I rifled through the book, looking for some way to incorporate both desires. And I found a way. Actually, a twofold way 😉
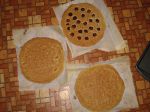
First, I found a recipe for short dough (German: “Mürbteig”). Almost all German decorated cakes (Gâteaus) have a bottom layer consisting of short dough. It helps transferring the cake from a storage plate into a display case, prevents the cake from “soaking through” and adds some nice texture and additional flavor to the cake.
And then, of course, I used the recipe for buttercream, which, in my opinion, is a lot better (nicer to work with and better in taste) than my “old” recipe.
As is the case with most decorated cakes, the Gâteau Lausanne requires a lot of preparation work. First of all, I had to bake all the layers. The picture on the left shows the Mise-en-Place for the sponges. In this case, they consist of almond paste (substituted for Marzipan), egg yolks, sponge cake crumbs, chopped hazelnuts, ground chocolate, flour, egg whites, sugar, and a handful cherries for one of the three layers.
The process of making the batter is rather elaborate. First, almond paste and egg yolks are beat together. Then, egg whites and sugar are beat together until they form stiff peaks. One third of the meringue is stirred into the egg yolk/almond paste batter, the rest is being folded into the mixture together with the dry ingredients. Then, two layers are spread in a circular shape onto a baking sheet and baked.
The third layer gets a topping of cherries before being baked. This will be the middle layer of the cake that adds some “fruityness” to the cake.
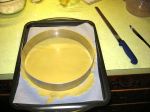
Next up was the short dough layer that would provide the base for the cake. After mixing the dough, I rolled it out, transferred it to a baking sheet and cut out a round shape of the size of the cake. No, this is not a huge cookie cutter, it’s the very versatile baking ring. You’ll see more of it later on.
Spreading out baked layers on the (preferably tiled, and of course clean) floor immediately after they came out of the oven is a “technique” that I learned from my master in Germany. It keeps the layers moist, they start “sweating.”
After they cooled off a bit on the floor, I stacked them using my new and fancy tiered cooling rack to let them cool completely. So, here are the four baked layers of the cake, baked and waiting for the next day to be assembled into the Gâteau Lausanne (they spent the night wrapped in plastic to prevent them from drying out).
The next morning, I prepared everything for the filling – a vanilla cream that is similar to pastry cream but different. The filling consists of egg yolks, milk, gelatin and vanilla pudding powder, cooked in a double boiler. While those ingredients are cooked, egg whites and sugar are whipped to stiff peaks. The stiff meringue is then folded into the hot vanilla mixture.
Here, again, the baking ring is of great use. I put the first sponge layer upside down on an aluminum cake sheet and cut it into a regular round shape using the cake ring. Then half of the still warm/hot vanilla cream is poured into the ring, on top of the first sponge layer.
The cherry-topped layer is put upside down on top of the first layer of vanilla cream, then the rest of the warm cream is poured into the ring.
At last, the remaining sponge layer is put on top of the cream layer, also upside down. Then, the “filled” cake has to sit and cool off, the cream has to set. That takes a couple of hours at room temperature. Putting it into the fridge or freezer is not an option because the cream layers would start to “sweat” and soak through the sponge layers.
Once the cake was cooled off, I started preparing the buttercream. Here, my little (haha) kitchen aid is whipping butter and margarine.
While the fat is whipping, I am preparing Swiss Meringue on the stove. Egg whites and sugar in a double boiler, and I use a hand mixer to not get a sore arm…
A thermometer is also a very handy tool if the recipe calls for heating the meringue to 120ºF… Once it has reached this temperature, the bowl is removed from the heat and the meringue is whipped further until it has cooled off. Then it is stirred into the butter. This makes a very very nice buttercream that has an awesome texture and tastes fantastic. It’s flavored with a little bit of vanilla extract and, in this case, a little bit of Rum.
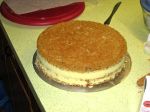
Now it’s time to free the cake from the ring. But before we can do that, we have to put the short dough “crust” layer on top of the cake and then flip the entire cake upside down. Then we can “cut” the cake “out of the ring.” And this is what it looks like. Naked, so to speak.
A first (very thin) layer of buttercream is applied to “close” the surface and provide an even surface for the second and final layer of buttercream. As you can see, the vanilla cream was not sufficiently set, so that it’s bulging out a little bit. I had to remove the buttercream layer and redo it after it had been in the fridge for about an hour…
The second layer is also applied rather thin on top, and a little thicker around the side. A nice little tool, shaped like some kind of a comb helps creating a neat pattern around the cake and remove excess buttercream. Then I used a little paring knife to shave of some chocolate shavings off a Baker’s chocolate square.
Pastry bag and star tip (size 10) are used to pipe little mounds of buttercream on top of each piece.
Cherry halves help pepping up the appearance and will taste nice later.
And finally, another two cherry halves and little stems, as well as a leaf finish off the decoration of the cake.
This is how it looks on the inside: Three layers of “almond sponge” and two layers of vanilla cream on top of a short dough crust that is “glued” to the bottom sponge layer with some cranberry preserves. It is a rather light cake because it almost contains no fat (only the buttercream icing contributes to the actual fat count). Also, the texture is very light and fluffy because of all the meringue that was folded into the sponges and the cream. A nice summer cake that you can have a second piece of without having to have a bad conscience 😉

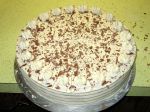
The final product in “artistic” presentation.
Gâteau Lausanne. A good old friend of mine…


